Tuesday, November 23, 2010

Blaze rules - more

Even our (highly paid) consultant didn't know of a way to change the data structure without re-importing the data into Blaze.  Then you can also by hand create new templates for each field, but in the end (unless you have tons of data/processes already set up) it was easier to delete and recreate.

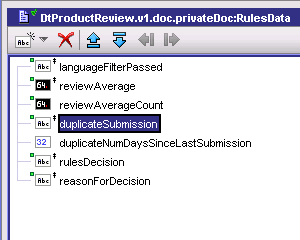
The other thing that isn't easy to spot is that to get the built-in rules for >, <, >=, <= etc for numbers, your data structure needs to be a number type.  I created a "rulesData" object with the variables with java objects set to doubles and ints and do the conversion before hitting the rules engine step.  The rulesData object is the one I imported into blaze.  It looks like this:


He had suggested just creating the object you need with Blaze itself (rather than importing from webMethods).  That worked, except then when you generate the webMethods deployment (Tools -> Generate Webmethods Deployment) the input parameter is just an object on the webMethods side with no visibility into what you need to send in.  You have to then go to Blaze and figure out the data structure, then create the same thing in webMethods and make sure you pass it in exactly the same.  Seemed rather over-complicated to me.

Friday, November 19, 2010

Blaze rules

Getting the data pulled over from your Integration Server isn't intuitively obvious and  the documentation for Blaze is not specific to webMethods.  I was going write up something on how to do it, then I found this tutorial.

Blaze Quickstart Tutorial for webMethods

One of the key things is the blaze implementation class, which you just have to know.
com.webmethods.blaze.bom.ISDocumentTypeProvider

Also, if your IS data changes, you can't refresh it.  Instead you have to delete and recreate it.  

Still haven't figured out how to recreate the data entries in the decision tree without recreating the tree yet, but I'll get there.

Tuesday, November 9, 2010

Error publishing task interface to MWS server

[POP.003.0025] {0} cannot view the content of {1}.; nested exception is:
com.webmethods.portal.PortalException: [POP.003.0025] {0} cannot view the content of {1}.
[POP.003.0025] {0} cannot view the content of {1}.; nested exception is:
com.webmethods.portal.PortalException: [POP.003.0025] {0} cannot view the content of {1}.


I got the above error when trying to publish a task.  Finally searched and figured it out.  You have to be logged in as SysAdmin to publish a task.  I had lost the login when I had to rebuild my workspace in Designer.

Wednesday, November 3, 2010

Log4j and Secure FTP in webmethods

Found a link with two nice packages for the IntegrationServer.  One for Log4j logs through the IS and another for Secure FTP.

http://webmethodsarchitect.com/

Tuesday, November 2, 2010

Notifications from tasks

Built-in way:
  1. In the solutions tab, go to Tasks->[Task Project Name]->[Task Name]-> Task Notifications
  2. Right click and create a new notification.  This is basically an email template.  You can use any of the pipeline data that is input to the task in the email.
  3. Open the task overview screen for the task you want a notification on.
  4. Click on the Events tab
  5. Add a new Event and name it appropriately
  6. In the Event Actions section, add a new action and select the Send Notification action.  Select the notification that you created in step 2.
Now the users need to subscribe to receive the notifications:
  1. Login to My Webmethods Server.
  2. Go to Monitoring->Business->Tasks->MyInbox
  3. Right above the Export Table button is a subscriptions link.  Click it.
  4. Hit the Subscribe button
  5. Select the notification and hit next.
  6. Click the checkbox after task subscriptions and hit save.
Note: As the Administrator, you can set up subscriptions for other users.  Also in 7.1.3 we could not get subscriptions to work when assigning a role to the subscription.  We had to do individuals.


Integration Server Way:

  1. Create a flow service (or java service) that will send out your email notification.
  2. Register that service in the Bindings window in designer in your task project.
  3. Open the task overview screen for the task you want a notification on.
  4. Click on the Events tab
  5. Add a new Event and name it appropriately
  6. In the Event Actions section, add a new action and select the Invoke Service action.
  7. Select the service you created in steps 1 and 2.
Note: You have to get the email addresses of the users manually, format the email, etc with this method.